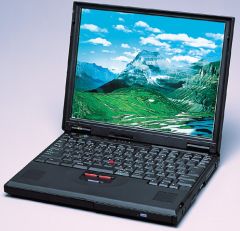
IBM ThinkPad 600E is the second in 600 series. ThinkPad 600 is a PCI-based machine with an MMC-1 processor. I believe the fastest one was Pentium II 300MHz. 600E is eqipped with the AGP, so the processor is of MMC-2 type. MMC-2 processor modules were produced to include the AGP and had Pentium II or Pentium III on them. After Pentium III 850MHz or so, MMC-2 disappeared, just like slot 1 processors did.
MMC-2 processor modules have an onboard regulator for the core voltage and a pin selects 66MHz or 100MHz bus. Since Pentium II modules and Pentium III modules are physically and electrically pin compatible, a Pentium II based 600e can be upgraded to a Pentium III. There are several issues though.
There are workarounds for every problems listed above, but they also limits on how far you can go. For example, you will not be able to run Pentium III 850MHz at 100% utilization for an extended period of time, or you will loose the onboard 32MB of RAM. Some people enjoy pushing it beyond limit, but I would rather want a stable machine that can be put into a real use.
2. BIOS workaroundsPeople have been doing it for some time and they have collected very useful information. You have to get in to the BIOS setup menu and then to the config submenu. There, you press [Ctrl][D] to enter the hex edit mode for direct adjustments of BIOS settings. When an error 127 occurs, select [test] then [exit] to reach the main menu.
Except several early ones, Penitum III MMC-2 modules are all equipped with Intel SpeedStep technology. It supports two speeds of operations. Whenever a mode change is in order, the processor suspends briefly and changes the on-chip clock multiplier. Since 600e has no support for it, the upgraded system will boot at low speed. The following is from Intel's web site
| ||||||||||||||||||||||||||||||||||||||||||||||||||||||||||||||||||||||||||||||||||||
Remember that the original mobile Penitum-II consumes 12-14W of power. Running a SpeedStep P-III in "powersave" mode seems reasonable. From eBay, you can find different speeds of P-IIIs, but if you are going to run it in "powersave" mode like me, don't try to get the highest speed available. For example, P-III 600MHz and 650MHz will run at the same frequency of 500MHz. So there is no point getting 650 MHz instead of 600MHz, especially if it means spending more money. I bought a 600MHz module at a very low price. According to the above spec, at 500MHz, it consumes 12.2W maximum, which is within the original 600e design specification.
Unfortunately for some versions of ThinkPad 600Es, popping in a new processor won't make it run faster. There are at least two different versions of BIOS for two different types of system boards. I have also seen several different part numbers for 600e system boards, so there might be other variations.
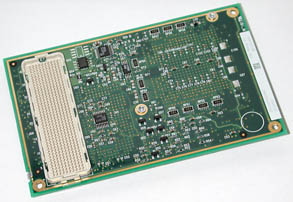
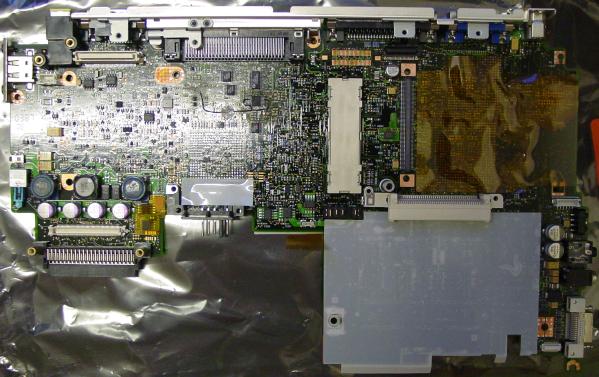
The ThinkPad 600E I got dirt cheap from eBay had a P-II 366MHz module and supervisor password locked system board. To unlock the password, it would cost extra $50 or so. So I bought an "unknown" system board (which I knew from ThinkPad 600E from the picture) for about $10 including shipping and it turned out fine. The newly acquired board was an older version, but otherwise was a drop-in replacement for the password-locked board.
The problem occurred when I installed a P-III 600MHz module. The multiplier was correctly set to 5x (for 500MHz powersave operation), but the FSB was still running at 66MHZ. So I was only getting 333MHz of CPU speed. I suspect that the old version of the system board is hardwired to 66MHz. Luckily, other people have figured out that changes in the clock generator chip wiring can cure the problem.
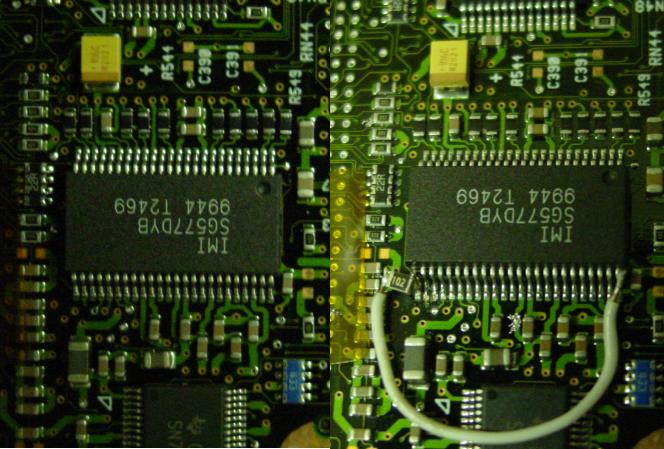
ThinkPad 600E has IMI SG577 clock generator chip on board. Since we know the chipset can handle 100MHz, it is safe to set the FSB frequency to 100MHz, as long as other components are also 100MHz-capable. I had to disable the internal RAM for this reason. The procedure is very simple in words: Cut the folio from pin 25 to the pull-down resister and connect to pin 48 using a 1K resister. But it is quite a challenge to work on SMD parts. I first salvaged a 1K SMD resister from an old circuit board. I melted the solder of pin 25 and lifted the pin off the PCB. A short thin wire was attached to the resister. The resister was soldered to the pin and the wire was soldered to pin 48. It was not very hard because the pins are located at the edges.
After this mod, my ThinkPad 600E has been running at 500MHz / 100MHz FSB reliably.
5. References